Monday 30 January 2012

Sock it to me

After a couple of weeks now of mostly posting on weekends I realized why it is that I've mostly been blogging on weekends lately.  It's not because I have more time on the weekends, I generally have a similar amount of free time that could be used for blogging on weekdays as I do on the weekends.  It's also not because I knit more on the weekends and therefore have more to post about.  Again, I usually knit for at least a couple of hours every day.  No, it's because of how short the daylight hours are right now.  Usually when I decide to prepare a post, it involves gathering the projects in process, taking pictures, uploading the pictures, editing them, and then writing the post all in one session.  On weekdays after I get home from work I have about 7.4 nanoseconds of decent daylight to take pictures before there is no place in my house that gets enough natural light to take good pictures.  I don't have any good artificial light, and I hate using flash for knitting because it makes the stitches disappear.  So long story short, I don't usually plan ahead enough to take all the pictures that I need on the weekend to fill up blog posts for the whole week.  I could just write for the sake of writing but I feel like my writing isn't interesting enough by itself, and I would have to throw in some random pictures from my computer just to keep y'all awake.

Like this:


What is it?  If you have a guess as to what it is, leave me a comment.  I may or may not have a prize for the winning commenter (I don't have a prize but please don't let that discourage you from guessing anyway.)  The answer will be in my next post.

Ok I promise this blog isn't going to turn into some weird random pictures thing.  All that pre-amble was mostly to say that this last weekend I actually managed to take more pictures than I planned on using, and I also remembered about some older pictures that I had meant to use but hadn't yet.  Yay!

One of the gifts the Enabler got me for Christmas was a 3 month subscription to the Sweet Georgia yarns sock yarn club.  At first I was sorta excited and then once I realized that it meant surprise yarn in the mail for 3 months straight I got really excited.  And then my January yarn came a couple of weeks ago and I went from really excited to "holycrapholycrapholycrap" excited.  This is January's yarn:


It's called "storm chaser" and it's a superwash sock yarn made with bluefaced leicester wool.  The colourway was inspired by the Vancouver winter where it's rainy and cloudy all the time.  I have no idea what I'm going to do with it yet.  It's one of those yarns that I don't mind holding onto for some time while I wait for the perfect pattern to present itself.  It'll come eventually, I know it will.  Only a couple more weeks until February's yarn!

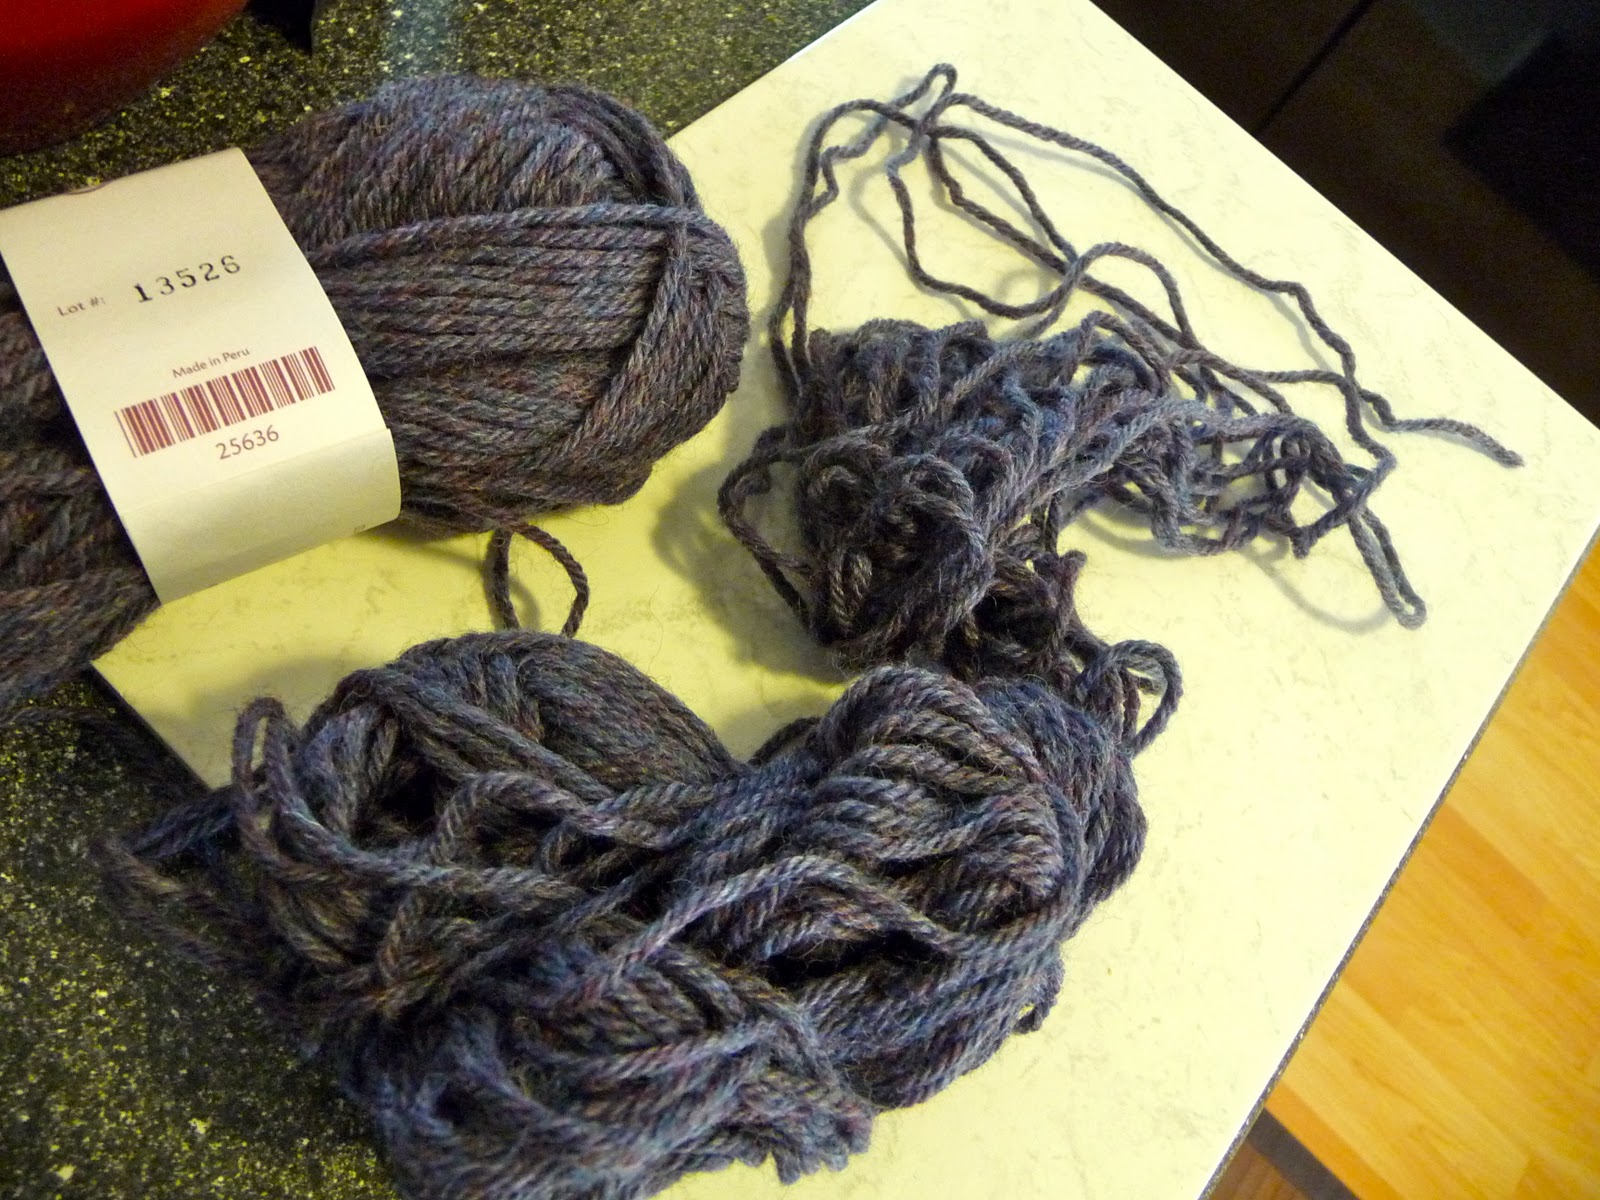
After I found out that I was getting sweet georgia yarn in the mail, but before I had actually received it, I got so excited about the yarn that I went to my LYS and got a different skein of sweet georgia yarn.  Let me justify myself by saying that it was on sale and I had a gift card and the colour was too gorgeous to leave behind and there was only one of them so obviously I HAD to buy it.  Is that enough justification?


I wasn't able to accurately capture the colour of this one but it's the tough love sock in the colourway tourmaline.  It's a much richer and deeper blue-green than how it looks in the picture, and it's gorgeous.  I wound it up today and cast on for the Snicket Socks.  I haven't made socks in awhile and although Winter hasn't really shown us more than a flash of its teeth yet, I want to make sure that I've got some nice warm socks to wear when it bears down on us for real.  You may think I'm being pessimistic, but I prefer to think of it as realistic.  And even if it doesn't get colder... well... y'know...  socks!!

Sunday 29 January 2012

Weekend (sweater) Update

I have now knit through four balls of yarn on my sweater and I just joined the fifth.  This does not count the ball of yarn that I started using for one of the sleeves.  I just finished decreasing for the waist, and have to knit a few more rows straight before I start increasing again for the bust.  However my friend/knitting mentor Helen told me that I should only do half the amount of increases as it says because otherwise the bust of the sweater will be too big for me.  I think she was trying to tell me something.

Anyway this is what it looks like so far.


When I had about half that amount of the body (after the cable band) completed, I started working on a sleeve.  I realized that the moss stitch of the body would likely reach epic mind numbing proportions at a blistering rate, and also once I'm done the torso portion I can't progress any further until the sleeves are done.  Which means that I have to also do two looooooong tubes of moss stitch.  I don't relish the idea of having to do both of those in a row, so this is why I started the sleeve.  However, I hit a bit of a snag.  After knitting about four inches of sleeve I decided to compare it to the body of the sweater, and was startled to see that the gauge of the sleeve was noticeably tighter than that of the body.  I couldn't figure out why this was, as the needles were the same size (yes, I checked and double checked), and they are both bamboo.  Frustrated by this discovery I stopped knitting the sleeve and went back to the body, thinking that I would rip out the sleeve and start on larger needles later.  So I finished ball four and decided to compare it with the sleeve again and decide how much it actually bothered me, wanting to avoid frogging if possible.  I'm glad I didn't rip it out right away though, because somehow in between starting and finishing ball four the gauge now seems to be the same, or at least close enough that it really doesn't bother me anymore.


I know I wasn't looking at it wrong before, because I had independent confirmation of the difference in gauge from two other knitters and a non-knitter.  So what happened?  I have no idea but I don't care!

One technique that has been really useful so far with this sweater is wet-splicing.  It's a great way to join two balls of yarn without having to tie them together and then worry about weaving in the ends (however it only works with non-superwash wool).  I think I've previously discussed my dislike of weaving in ends.  I'm too much of a perfectionist to not do it, but I just don't enjoy the process.

Wet splicing is where you actually felt the two ends of the yarn together.  This is how I do it.

1. Find the end of the yarn in your new ball of yarn.  This often results in what we like to call "yarn barf".  It can be a time consuming and frustrating process, but is ultimately satisfying, not unlike popping a stubborn zit.


2. Pick apart about 1.5-2" of the ends of both the new ball and the yarn attached to your project


3. Overlap the ends, intertwine them a bit if you wish.  If you're really intense, try weaving them together.  I don't do this, but don't let me stop you.


 4. Run some hot water over the overlapped section of yarn, and rub vigorously between your palms until it starts to felt together.  Keep rubbing until both the ends have disappeared into the strand, adding more water if necessary.


It probably won't be completely invisible, but once it's knit up you won't even notice it's there.  Let it dry (or don't, I'm usually too impatient to wait the 5 minutes for it to dry), and knit on!


That's all the knitting talk for today, but I have a treat for you because you're such good blog readers!

...A picture of my cats doing their best impression of this.

Sunday 22 January 2012

Mittens in the snow

I finished the Snowbird Mittens a couple of weeks ago, and yes there is now snow on the ground.  I don't actually think it's because I finished the mittens but you never know.  I still haven't washed/blocked them because I've been lazy but I think they already look pretty good.  There are a couple of things I didn't love about the pattern (i.e. the cuff is too short and I should have made it longer than it said to, and the thumbs are tight but hopefully blocking them will loosen them up a little), but overall I'm pretty happy with them.

The colour work was made much easier by a technique I read about in 200 Fair Isle Motifs.  There are lots of points in these mittens where you have to carry one yarn along without creating a stitch with it for 10-15 stitches, which is far too long of a float to leave inside the mitten.  To deal with this problem, for the first mitten and a half I would stop knitting every 3-4 stitches and twist the yarns around each other.  This meant that I was constantly stopping and starting and having to drop and pick up my yarns.  Doable, but time consuming and I couldn't help but feel that there was a better way to do it, I just didn't know what that better way would be.

Then I got my book in the mail and while flipping through it I was pleased to see that there were techniques included as well as fair isle patterns.  Since I am new to fair isle knitting I was interested in seeing what kind of techniques there were, and lo and behold, the book talked about something called "weaving".  After reading it I quickly realized that this was the solution I'd been looking for.  This technique allows you to keep holding both yarns and trap the floats quickly and easily.  I was able to work it out by reading and looking at the illustrations in the book, but this video also does a good job of showing this technique.  If you are interested in fair isle knitting, I highly recommend this book as it is full of beautiful motifs and they are pictured and charted in a really helpful way.  I haven't tried knitting any of them yet but it's only a matter of time.

Apparently I've really enjoyed making mittens lately because this week I also finished my Snapdragon Flip-Tops to go with my hat.  I LOVE these mittens.  I've worn them almost every day since I finished them and the times when I wore different mittens I wished I was wearing these instead.  It's kind of sad really, I have all these beautiful mittens now and they might not get the love they deserve because I'm so obsessed with these.  It's because they have everything going for them.  They're beautiful and reasonably warm, they fit well, and they are highly practical because I don't have to take them all the way off in order to use my phone or dig my keys out of my purse.  All in all they are pretty much the perfect mittens.

  They weren't super easy to make due to the nature of flip-top mittens, but Ysolda Teague is a great pattern writer and she provided very helpful detailed and diagrams to make sure that the flip top portion is attached seamlessly.  The top was attached by picking up stitches across the back of the hand, casting on more stitches and then knitting it in the round on only two needles.  It was pretty awkward and took some getting used to but avoided the need for knitting the top separately and then sewing it on afterwards.  This is great because I can't stand finishing work!  The only finishing work these mittens had was weaving in the ends and sewing on the buttons.

Snapdragon Flip-Tops: Making winter fun since 2012.


Saturday 21 January 2012

Adventures in Sweaterland

I meant to post earlier this week but work has been rough lately and all that hard work makes my arms hurt, and the thought of coming home and sitting in front of the computer even longer just didn't appeal to me at all.  Even intensive knitting didn't make them feel better.  I actually had to take a knitting break and didn't knit at all yesterday to try and let my arms recover a little.  The Enabler and I went to the movies instead which was lots of fun, we saw Sherlock Holmes 2: A Game of Shadows.  So good!  I was was pretty sure it was going to be good and that I was going to like it, but it ended up being at least twice as awesome as I was expecting.  Yeah I'll admit the fact that it stars Robert Downey Jr. and Jude Law (who somehow manage to be quite easy on the eyes even when sporting multiple bruises and head wounds) doesn't hurt but it's fantastic aside from them too. *cough* Stephen Fry *cough*

Okay enough of that because I could probably go on for awhile.  I got the yarn that I ordered from KnitPicks for my very first sweater!  I ordered Wool of the Andes worsted weight in the colour Mineral Heather.  I wasn't totally sure what to expect since ordering things online can be a bit of a crapshoot when it comes to colours, but I'm pretty pleased with it.  It's this dusty purple-blue-grey, but if you look closely at the strands there is a little bit of bright red in it too, and every so often there is a fleck of red in my knitting.  It's a very cozy and casual sort of colour which is perfect for this project.  It's also very reasonably priced (even though the prices just went up, I ordered when it was $2.19 for a 50 g/110 yd ball, it is now $2.69 for the same ball).  I think it's very similar in quality and feel to Cascade 220 worsted.  It's not a luxurious next-to-the-skin kind of yarn but it's pretty great for a sweater that's meant as an outer layer, which is what I'm using it for.


I got my hands on the yarn last Saturday.  I had been planning on going to a birthday party with the Enabler for one of his friends that I don't really know, but when the yarn came I decided to stay home and swatch instead.  Do I know how to party or what?  I had never swatched before but I figured since this is something where the size actually matters, I probably should.  I'm making the Providence Hoodie from New England Knits, and it calls for 5 mm needles in the pattern.  Since I always knit loosely I had gotten a 4 mm, 40" circular needle and was just hoping that it would be the right size.  I did manage to get the right gauge with it after knitting a few rows, I just have to remember to knit loosely like I always do and not try to make it tighter.  That'll be okay though, looser knitting is easier on the hands anyway.


The body of the sweater is knit in moss stitch which I know will be pretty tedious but it'll make it that much warmer (and it also doesn't matter so much that I purl looser than I knit although this is something that I'm working on).  The swatch in moss stitch didn't take that long so hopefully it's not too bad.  Right now I'm still working on the cabled band at the bottom.


 I'm getting close to the end of it but I've already gone through 2 of the 17 balls of yarn that I ordered.  I intended on ordering more than I needed (and I think I did) but this cabled bit seems like it is eating up a lot of yarn so we'll see.  If I get the main body of the sweater finished and don't think I have enough for the hood and the button band I can always leave the hood off.  According to some people that have made it the hood is a bit too small to be useful anyway and is more for show than anything else, so I'm not sure what I will do yet.


I can't wait to finish the cabled part so I can get to the next part, which is picking up stitches along the long side of it to start working the 8000 miles of moss stitch for the body.... hmm.  On second thought, maybe I'll make the sleeves first.

Friday 13 January 2012

Pull-Apart Scarf

Awhile back my mom told me about this scarf that she used to make all the time that she called a pull-apart scarf.  She got the pattern from her mom, and her and her sisters used to make it and at this point none of them has any idea where the pattern came from.  My mom described it to me and I thought she sounded nuts so finally I got her to give me the pattern so I could try it out myself.  Her version of the pattern was hand-written on a yellowed index card.  All this is to say that I did not design this but I did make a few amendments to make it work better.

So here it is!  I have given the yarn and needles that I used but yarn, gauge, and needle size are not that important for this project.  

I used Cascade Soft Spun, but unless you have six or so hours to spend on pulling this thing apart, I recommend using a worsted to bulky weight yarn that is fairly smooth (boucle or other fuzzy yarns would be a terrible idea) and spun fairly tightly.  That said, the finished product knit with soft spun is SO soft and luxurious.  So perhaps it's worth it, but that's your call.

Yarn: 150-220 yds of your favourite worsted, aran, or bulky weight yarn.
Needles: dpns appropriate for chosen yarn (5 mm for worsted weight works well)
Gauge: not important

Beginning of scarf:
CO an even number of stitches that is divisible by 3 (for worsted weight yarn 30 stitches is appropriate, but adjust as necessary).  Long-tail cast on is a good choice.  Divide stitches evenly over 3 needles and join to work in the round.

Work k1, p1 ribbing until piece measures 1.5".  This is to keep it from curling since stockinette will curl.  You may also do this portion in seed stitch if you prefer (Rnd 1: k1, p1, repeat to end.  Rnd 2: p1, k1, repeat to end.  Repeat these two rounds until appropriate length.)


Body of scarf: 
K1, yarn over (YO), repeat to end of round.  You should be starting each needle with a knit stitch and ending each needle with a YO.  It is very important that after this round you do not move the stitches around on the needles. After this round you should have double the number of stitches that you began with (60 if you started with 30).


Next round, K all stitches.  Continue in stockinette stitch until you have approx. 10 yards of yarn left.  Leave more if you are worried about running out.  (I had about 8 yards left before this last part and after binding off I had less than half a yard left.)

At this point the piece will look like the ugliest, baggiest, most ridiculous sweater sleeve in the world.  It will also not look long enough for a scarf.  But just trust me.


End of scarf:
K1, drop 1, repeat to end of round.  You should be back to your original number of stitches (30).  This is why keeping track of your YOs at the beginning is important.  You want to make sure that the YOs line up with the dropped stitches.  Otherwise, terrible things will happen (earthquakes, floods, indigestion, you name it).


Begin k1, p1 ribbing again (or seed stitch) for another 1.5" (or until you have just enough yarn left to bind off).  BO loosely in pattern.

Now comes the fun part, and is where the scarf gets its name.  Begin pulling apart the dropped stitches until they have all pulled right down to the YOs at the beginning.  If you have used a smooth yarn, they should pull apart very easily.  If you are crazy like me and used a fuzzy or loosely spun yarn, this process will take much (MUCH) longer.  Once complete the scarf should be 2-3 times as long as it was before dropping the stitches, and the stitches will be very loose.


Weave in all ends, and you're done!

This piece can be worn like a normal scarf, or you can tuck one end inside the other end to create a loop, place the join at the back of your neck and wrap around to wear as a cowl!  This is how I prefer to wear mine.  The ribbed bit at the end helps keep the other end from sliding out, plus when it's inside a coat it's not going to go anywhere anyway.  


Enjoy!  Feedback is encouraged as I have never written out a pattern before.  Thanks for reading!

Tuesday 10 January 2012

With a capital "S"

Last week, the Enabler got Sick.  Usually when he gets sick it's no big deal and he's healthy again in no time.  But when this sick lasted longer than a couple of days and made him tired enough that I (gasp!) actually had to cook dinner a couple of times, I knew something was up.  Next, people at work started dropping like flies.  I knew it was only a matter of time at that point.  I think I started getting sympathy symptoms before the real ones set in, and sure enough, Friday evening I knew for certain that I was Sick.

I woke up early on Saturday anyway, and got some good knitting time in.  I actually finished two projects before noon (posts on those coming soon), which meant that the only started project I had on the go was that lace tipped striped scarf that I'm less than enthusiastic about these days.  So instead of starting something new (since the Sick was really starting to take hold by then and I couldn't muster the energy to think of what to start next or go rooting through my stash), I just lay on the couch watching movies or playing video games.  This lasted for the rest of Saturday, and all of Sunday, and half of Monday (I stayed home from work since I couldn't walk more than 10 feet without feeling like I was going to die).  The other half of Monday was spent in bed due to the fact that my head was playing host to a very large, boisterous, and unrehearsed drum circle.  The worst part about this nearly three day span was that I kept thinking what ideal knitting time this could have been if I could only muster the energy to find the Noro and some needles and cast on for that Noro Striped Scarf I've been meaning to do (because that's about as complex as I could have handled)... but I couldn't even do that.  It was awful.  I haven't gone that long without knitting in probably a year now.  Sure there's been a knitting-free day here and there but even those are few and far between, and NEVER two in a row.

So today, I did manage to go to work, but it wasn't great.  I was pretty exhausted at the end of the day, but when I got home it wasn't more than a few minutes before I decided enough was enough, headed purposefully to my stash, and found the needles and the yarn to make the Snapdragon Flip-Tops.  I think the surprising success of the hat really gave me the push to start these so I can have the matching set.

I had a false start but it didn't take me long to figure out that 3.75 mm needles was going to be too loose, although the pattern calls for 4 mm.  I don't have any 3.5 mm needles but I cast on with the 3.25 mm needles and it seems just about right.  Even with those it seems a little loose but I think it'll work just fine.

When the Enabler noticed what I was doing he smiled and said "So you're feeling better then?"  And I realized that I was feeling better.  Still sick, but not Sick.  Of course the knitting and kitties may have something to do with that.

Friday 6 January 2012

The hat that (almost) wouldn't be

After all my gift knitting was done, I decided it was time to make myself something special, and the project that I decided on was a hat.  This was a hat that I'd been planning for awhile.  I'd bought the yarn when I was on Vancouver Island back in October, three skeins of madelinetosh dk in the forestry colourway.  Gorgeous.  I was waiting for the perfect project for this yarn and was pretty thrilled when I came across the Snapdragon Tam and Flip Top Mittens patterns by Ysolda Teague.  Intricate cables and a cute matching set were the perfect thing to show off this unique yarn, and wouldn't you know it, each pattern called for just one skein of the exact yarn I had already!  I knew it was meant to be.

I finally cast on about a week before Christmas and had some doubts about my gauge, but it seemed to be okay so I kept going.  I had decided to knit the medium size of hat and went down a needle size because my gauge is always looser than what patterns generally call for.  I also have a big head so I trusted that it would all work out.  And anyway, this hat is supposed to be a slouchy tam style hat (although if you look at the project gallery on ravelry, a number of the hats shown look like tiny beanies.  Weird).  I had the brim and a few inches of the cabled section done by the time the Enabler and I went to visit my parents on Christmas Eve.  I knitted furiously while rooted in the armchair at my parents house and managed to finish it in the evening on Christmas Day, after we'd already come back home.  The size seemed fine, unblocked it was like a loose toque that kind of stuck out in the back.  This was a hat that definitely needed blocking to open up the cables.


The only problem was that I didn't have any plates that were the right size.  My plates are all either 8 inches or 12 inches in diameter.  The solution was to head over to my local thrift store and searched through all the dishes until I finally found one that was 10 inches.  Perfect.  It was even 25% off (because obviously $1.00 is too much to pay for a plate but $0.75 is just right). 

The hat sat unblocked for a week until I finally got around to it this past Monday.  Not that I wasn't excited about it, trust me.  I was super excited about this hat because it was finally something beautiful for me, and I don't have any hats that I like.  I should also mention that while I've blocked a few things before (like shawls, cowls, and mittens), I am not an experienced blocker and had never before blocked a hat.  I filled up the sink, added the soap, dunked the hat, and waited 30 minutes to really get some optimum soaking happening.  All was well.  Or so I thought.

After 30 minutes I drained the sink and picked up my hat with ecstatic anticipation... and immediately realized that all was most definitely not well.  It was HUGE.  I mean, this thing would have been slouchy on a basketball.  And my head is big, but it's not THAT big (shut up no it's not I swear).  I tried not to panic, I thought maybe the weight of the water was just stretching it out a lot.  So I laid it on a towel and rolled up and squeezed it to get as much of the water out as possible, and it was a lot drier after I did that, but no smaller.  I thought maybe my eyes were playing tricks on me.  I put it on and looked at myself in the mirror.  It was the slouchiest hat I had ever seen.  Even super slouchy hats weren't this slouchy.  The middle of it was resting on the back of my neck, and the rest of it was on my back.  Now I started to worry, but I still wasn't giving up on it.  I got my plate and put the hat around the plate.  The hat completely engulfed the plate and the plate looked like it was going to have no effect on the hat whatsoever.  But I am stubborn, and was determined to make it work.

I arranged the hat around the plate as best I could and left it to dry, but I was starting to lose hope.  I started thinking that it was a good thing that I still had two skeins of this yarn left... I could try again and instead of blocking it by soaking I could steam it or spritz it instead... but ultimately I decided to just wait and see what happens.

Two days later (yeah yeah I know I'm supposed to wait longer than that but I just couldn't) I decided to check on it and see if any miracles had occurred.  And this is where my inexperience in blocking is probably obvious, because even though I KNOW that wool is weaker when it's wet, and I KNOW that the fibres will set after drying and time, I didn't really believe it that a seemingly giant hat could actually get smaller.  But it did.  It's at least small enough that I can wear it and it doesn't fall off my head, and no part of it touches my back (and hardly even my neck).  So now I have a cute (but still quite slouchy) hat.  Yay!


Photo angle on the last picture courtesy of the Enabler, who supposedly likes my (giant) nose.

Sunday 1 January 2012

Let it snow!

The ridiculous Snowbird Mittens are getting close to being done... I've half convinced myself that it's not going to get cold and snowy out until they are finished. Half of me doesn't mind the lack of snow (I mean real snow, not the piddly inch or so that we've got now), but I'm also getting pretty excited about finishing these crazy things. Only half a bazillion hours to go!